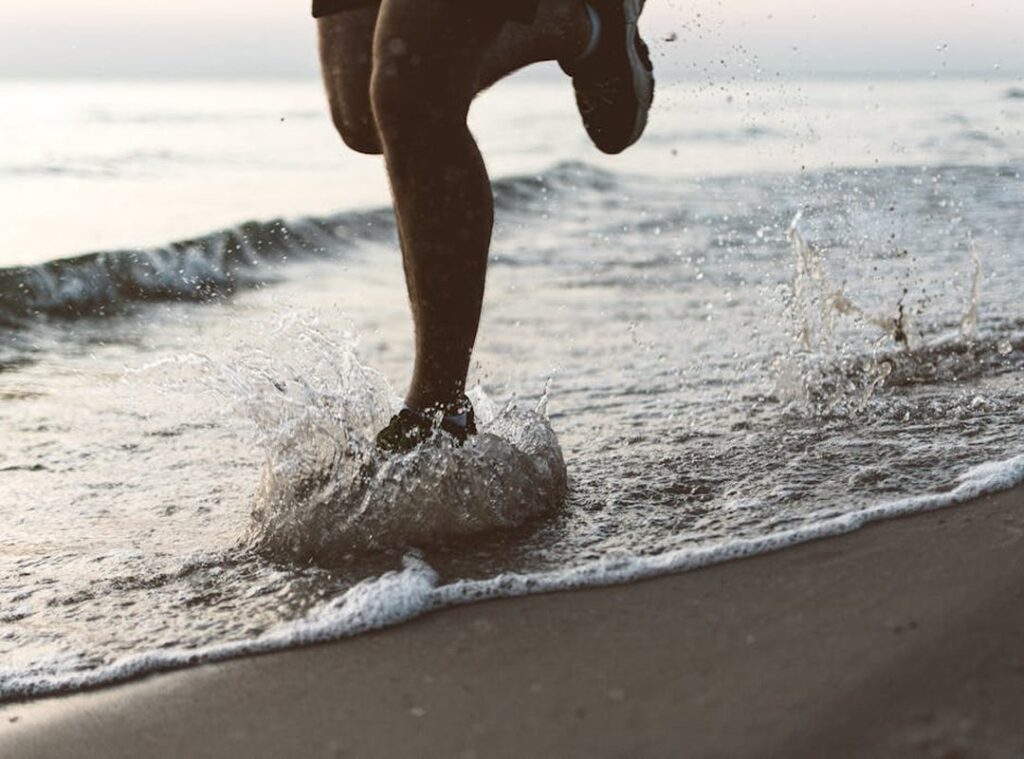
Creating an animated clip of a character running on water can be a real challenge. You need to get the physics and fluid dynamics just right, or it looks like a bad cartoon. Trust me, I’ve been there.
This guide is all about making that scene look realistic and engaging. We’ll dive into key techniques and tools. No fluff, just practical tips from experienced animators.
You might be wondering, how do I even start? Well, let’s break it down step-by-step. sonic running on water gif is a great example to study. It shows you what works and what doesn’t.
By the end, you’ll have a visually stunning animated clip. One that makes people say, “Wow, how did they do that?” So, let’s get started.
Understanding the Basics of Animation
Key Concepts
Let’s dive right into it. Timing, spacing, and squash-and-stretch are the building blocks of great animation. Timing is all about how fast or slow an action happens.
Spacing? That’s the distance between each frame, which gives the illusion of movement. And squash-and-stretch?
It’s what makes your characters feel bouncy and alive.
Tools Overview
You’ve got a few solid options for software. Adobe Animate is a go-to for 2D animations, while Blender is fantastic for 3D. Toon Boom Harmony is another top choice, especially if you’re aiming for professional-level 2D work.
Each has its strengths, so pick the one that fits your project best.
Pre-Production Tips
Before you even start animating, storyboarding is a must. It’s like a comic strip of your animation, helping you plan out the sequence and timing. Trust me, spending time on this step can save you hours of rework later.

So, what’s next? You might be wondering how to get started with these tools. Don’t worry, most of them have free trials and tons of tutorials online.
Dive in, experiment, and see what works for you. If you hit a roadblock, there are plenty of forums and communities where you can ask for help.
Creating the Character
Designing a character that’s both visually appealing and suitable for the running-on-water effect can be a fun challenge. First, think about the overall style. Do you want something realistic or more cartoonish?
Underline what’s important. For example, if your character is going to run on water, they need to have a light, agile build. Think of characters like Sonic—streamlined and fast.
Modeling and rigging come next. If you’re working in 3D, start with a basic mesh. Use simple shapes to block out the form.
Then, refine it by adding details.
For 2D, sketch your character first. Clean up the lines and make sure the proportions are right. This is crucial for smooth movement.
Set up the rig. In 3D, this means creating a skeleton that controls the character’s movements. Make sure the joints are well-placed, especially in the legs and feet.
In 2D, use a simpler rig. Focus on key points like the hips, knees, and ankles. This will help you animate the running motion smoothly.
Texture and shading add life to your character. Choose a color palette that fits the character’s personality. For a water-running character, maybe go with cool blues and greens.
Add texture to the skin, clothing, and any other elements. This makes the character look more real, and shading is key.
Use light and shadow to give depth and dimension.
Here’s a quick tip: Watch a sonic running on water gif to get a feel for the fluidity and speed. It can inspire how you design and animate your character.
Creating a character that can run on water is all about balance—between style, functionality, and visual appeal. With these steps, you’ll be well on your way.
Animating the Character’s Movement
Keyframe Animation: How to use keyframes to create the running motion, focusing on natural and fluid movements. It’s frustrating when the character looks stiff and robotic, right?
Timing and Spacing: Tips for adjusting the timing and spacing to achieve a realistic running-on-water effect. Getting this right can be a real headache.
Secondary Actions: Adding small, subtle movements (e.g., hair, clothing) to enhance the realism. These little details make all the difference.
One of the biggest annoyances is when the animation feels off. You spend hours tweaking, and it still doesn’t look right.
Timing and spacing are crucial. If the character’s feet don’t hit the water at the right moment, it breaks the illusion.
And don’t even get me started on secondary actions. A little bit of wind in the hair or a slight sway in the clothing can transform the scene.
So, how do you fix these issues? Start by breaking down the movement into key poses. Then, adjust the timing to make sure each step flows naturally.
Finally, add those subtle secondary actions, and trust me, it’s worth the extra effort.
Simulating Water Dynamics
Water simulation can be a game-changer in creating immersive and realistic environments. Using particle systems and fluid simulation tools, you can make water look and behave like the real thing.

When it comes to interaction with the character, think about how water reacts to movements. Ripples and splashes add that extra layer of realism. It’s all about those small details that make the experience feel natural.
Reflections and refractions are key for enhancing visual quality. They make the water look more lifelike, adding depth and dimension. This is especially important in high-stakes scenarios, like when you’re managing your resources in a digital casino.
Speaking of which, if you’re into gaming, check out this bankroll management strategy long term casino success. It’s a must-read for anyone looking to stay afloat in the long run.
Adding Visual Effects and Polishing the Scene
Visual effects can make or break a scene. Trust me, I’ve seen it happen. Incorporating additional effects like mist, droplets, and light rays can really enhance the mood.
Lighting is another key element, and it’s not just about making things bright. You need to set up lighting to create the desired atmosphere.
Think about the time of day and the emotions you want to evoke.
Final touches are where the magic happens. Adjusting colors, adding filters, and fine-tuning the overall composition can transform a good scene into a great one.
Pro tip: Don’t overdo it, and subtlety is your friend. A little goes a long way in making your scene look professional and polished.
Exporting and Sharing Your Animation
Rendering your animation can be a bit of a headache. But it doesn’t have to be. Use the highest resolution settings for the best quality.
This ensures smooth playback and a professional look.
Pro Tip: Always do a test render first. It saves you from wasting time on a full render that might not turn out as expected.
When it comes to sharing, you’ve got options. Uploading to social media is a no-brainer. It’s quick and gets your work in front of a broad audience.
YouTube is another great platform. It’s perfect for longer animations and detailed explanations. Plus, you can build a following over time.
Animation-specific platforms are also worth considering. They cater to a more niche audience who really appreciate the craft.
Underline the importance of choosing the right platform based on your goals. Are you looking for feedback, exposure, or just a place to store your work? Each platform has its strengths.
Remember, the key is to get your work out there. Don’t let it sit on your hard drive. Share it, get feedback, and keep improving.
Bringing Your Animated Clip to Life
Recapping the key steps and techniques for creating an animated clip of a character running on water is essential. Focus on the fluidity of motion, the interaction between the character’s feet and the water, and the overall timing.
sonic running on water gif can serve as a great reference for understanding the dynamics involved. Practice, patience, and attention to detail are crucial in achieving a professional and visually stunning result.
Experiment with different styles and refine your skills over time. Sharing your creations with the community can provide valuable feedback and inspiration.